MacOS
How to install Certificate and debug HTTPS requests/responses on MacOS.
Install Certificate on MacOS
In order to capture encrypted HTTPS requests/responses, you have to install EchoProxy Certificate on your current device.
You can install the EchoProxy Certificate by following the instruction
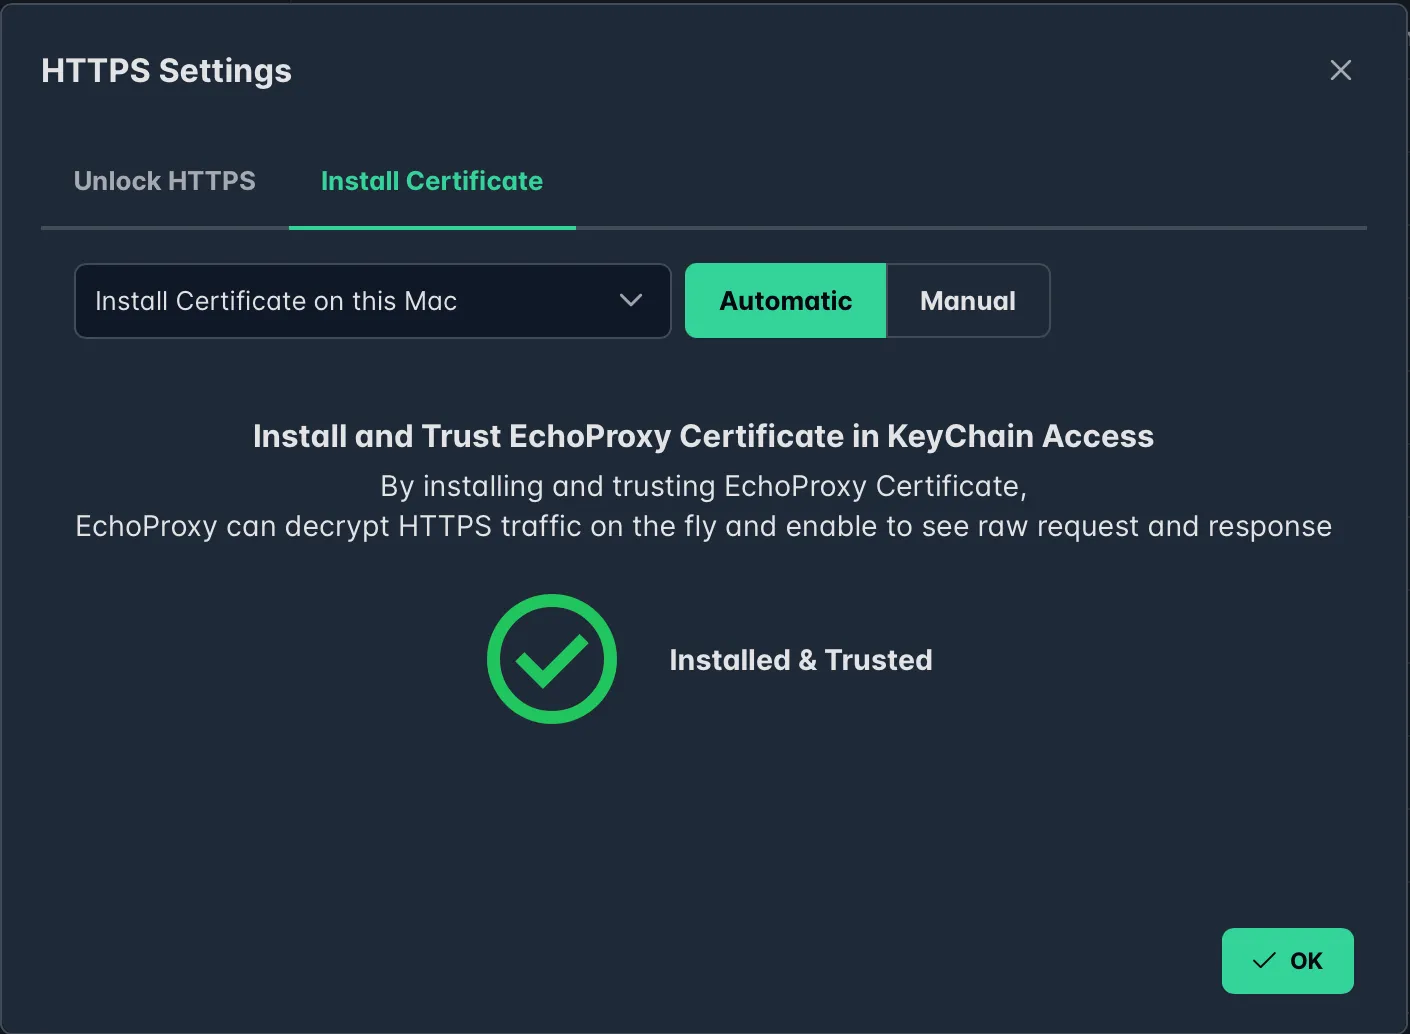
Click top toolbar button → Install Certificate on this Mac
1. Automatic mode
EchoProxy could automatically install & trust the Certificate in Keychain by following the instruction. It’s convenient for the majority of users and we can start debugging now.
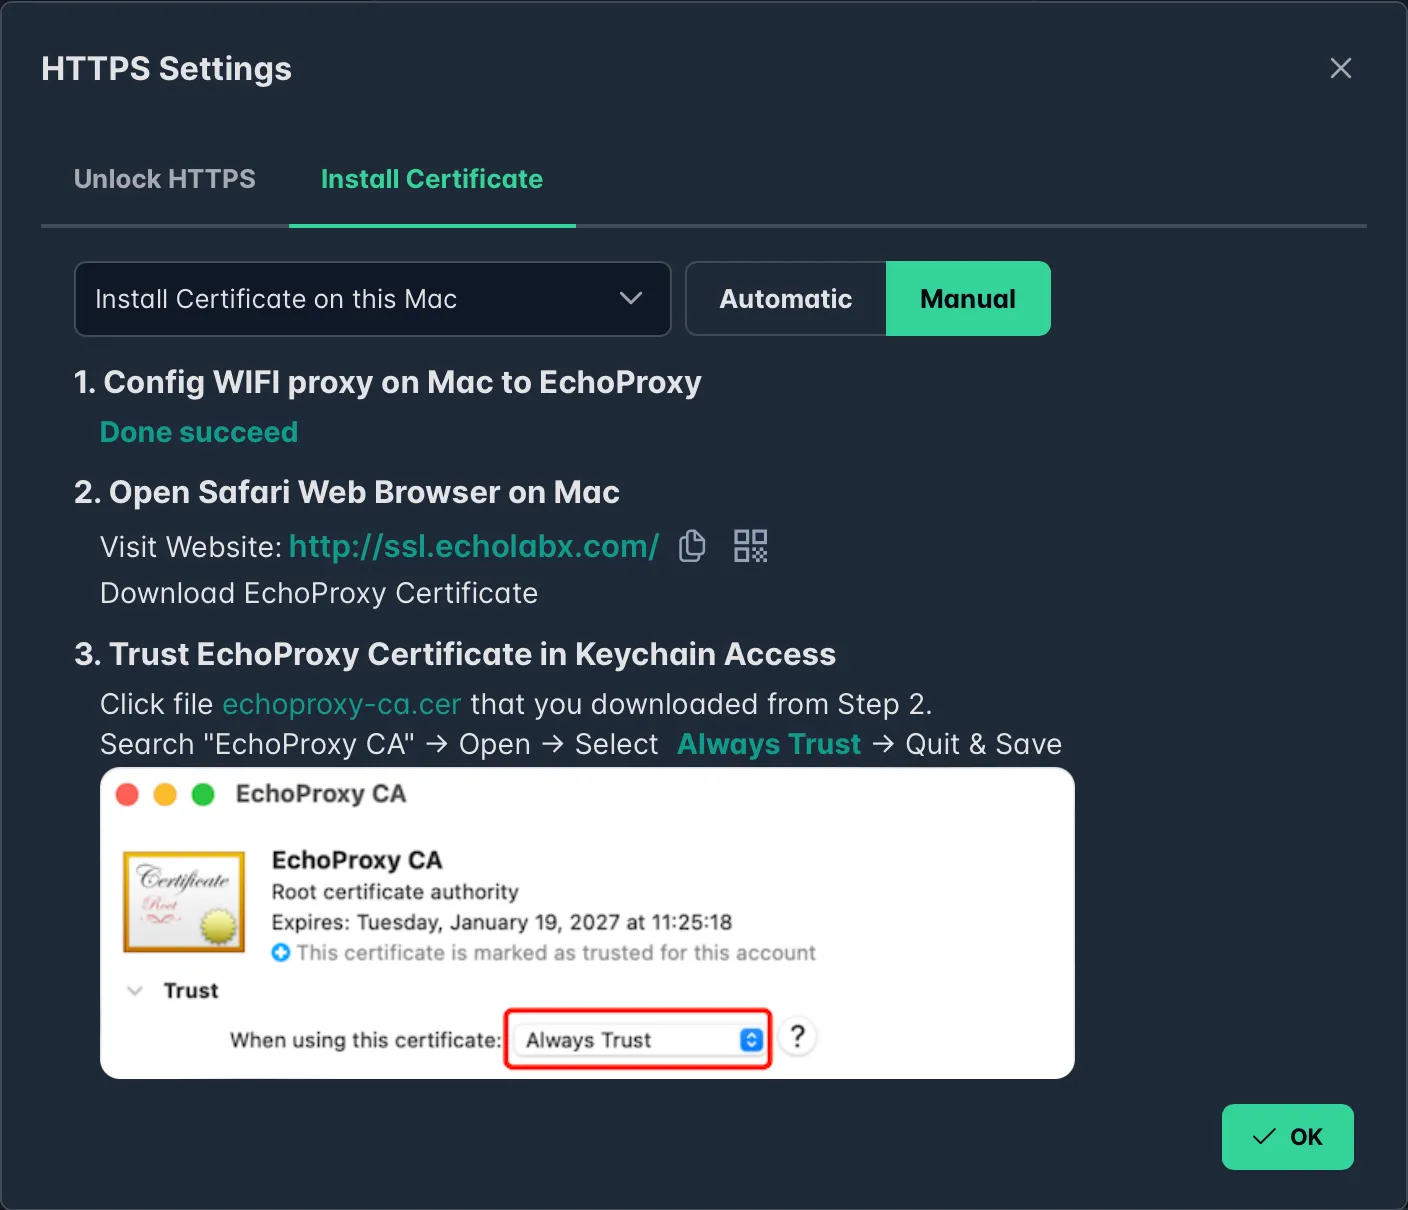
2. Manual Mode
If automatically install failed, you can try manually install & trust EchoProxy Certificate in Keychain by following the instruction.
Unlock HTTPS
EchoProxy uses tunnel mode for HTTPS connections by default. You need to Unlock HTTPS by domain or app name to see raw request/response.
Prerequisite: EchoProxy Certificate installed & trusted successfully
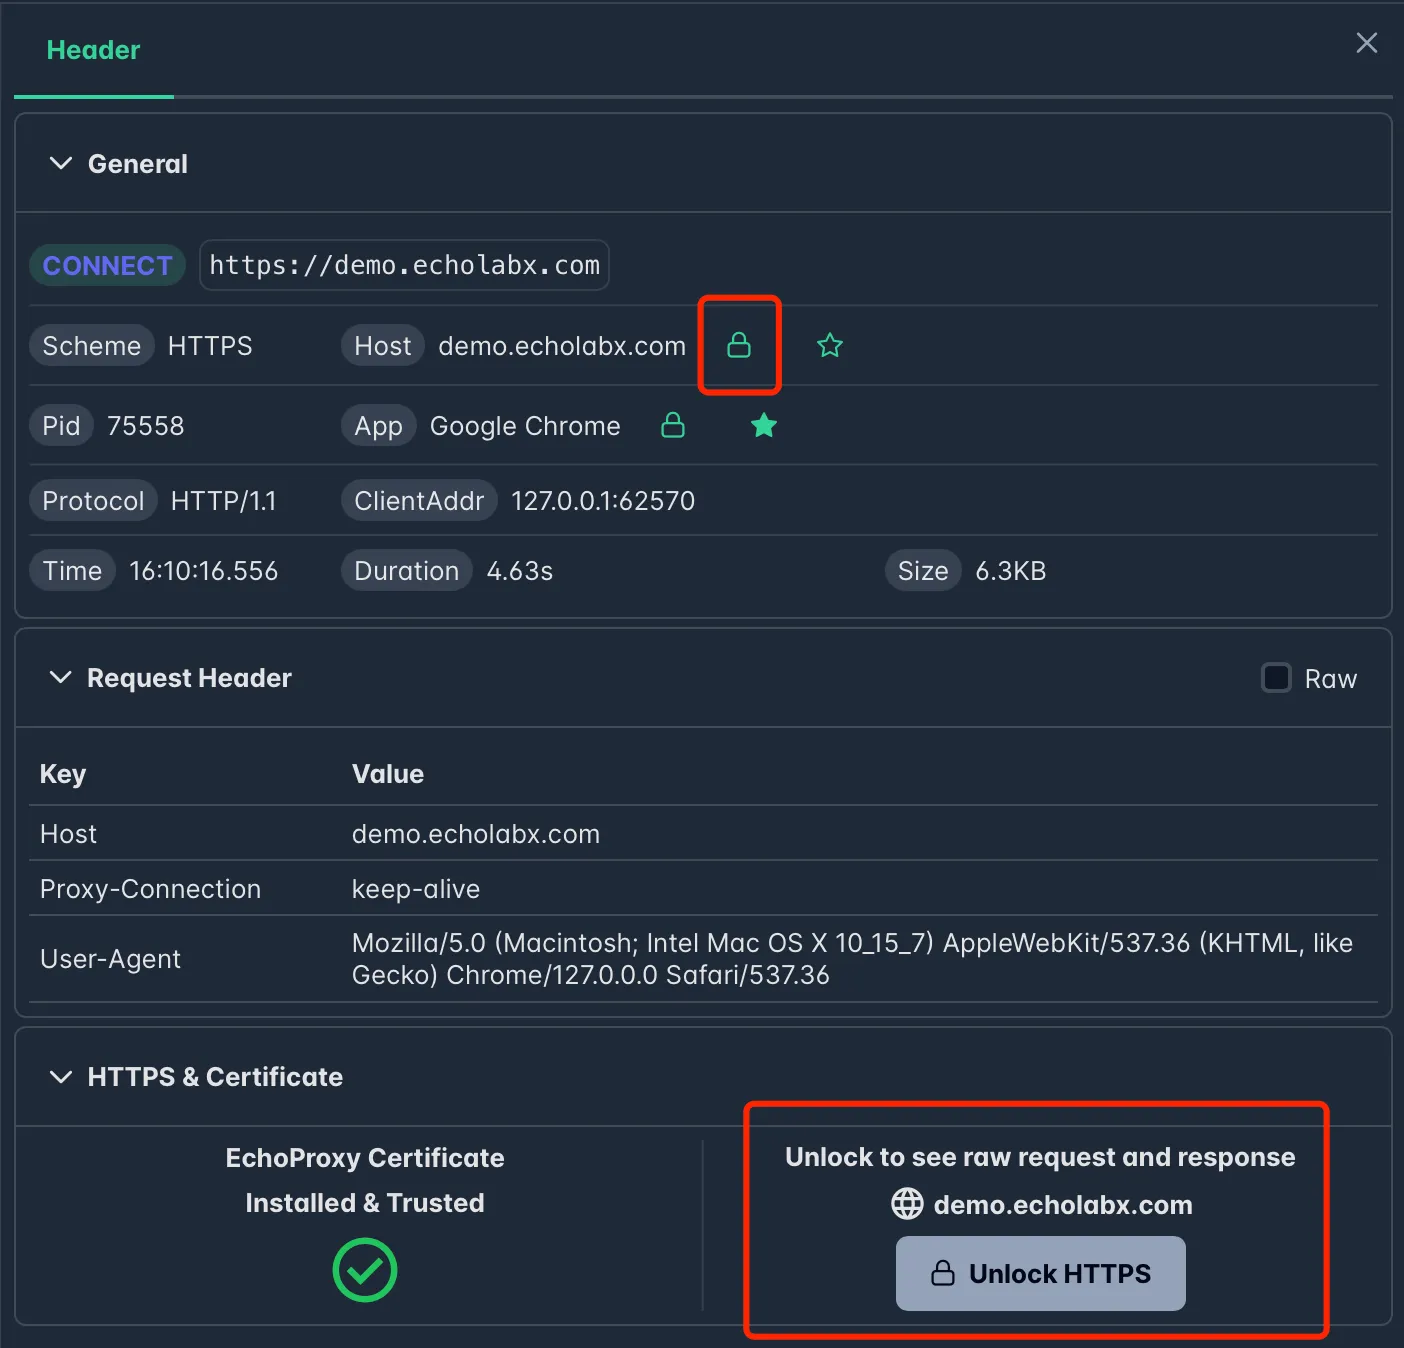
1. Quick Unlock HTTPS
You can unlock HTTPS by click button in Header/Gerneral.
And then resend the HTTPS request, you’ll see raw request/response for the domain.
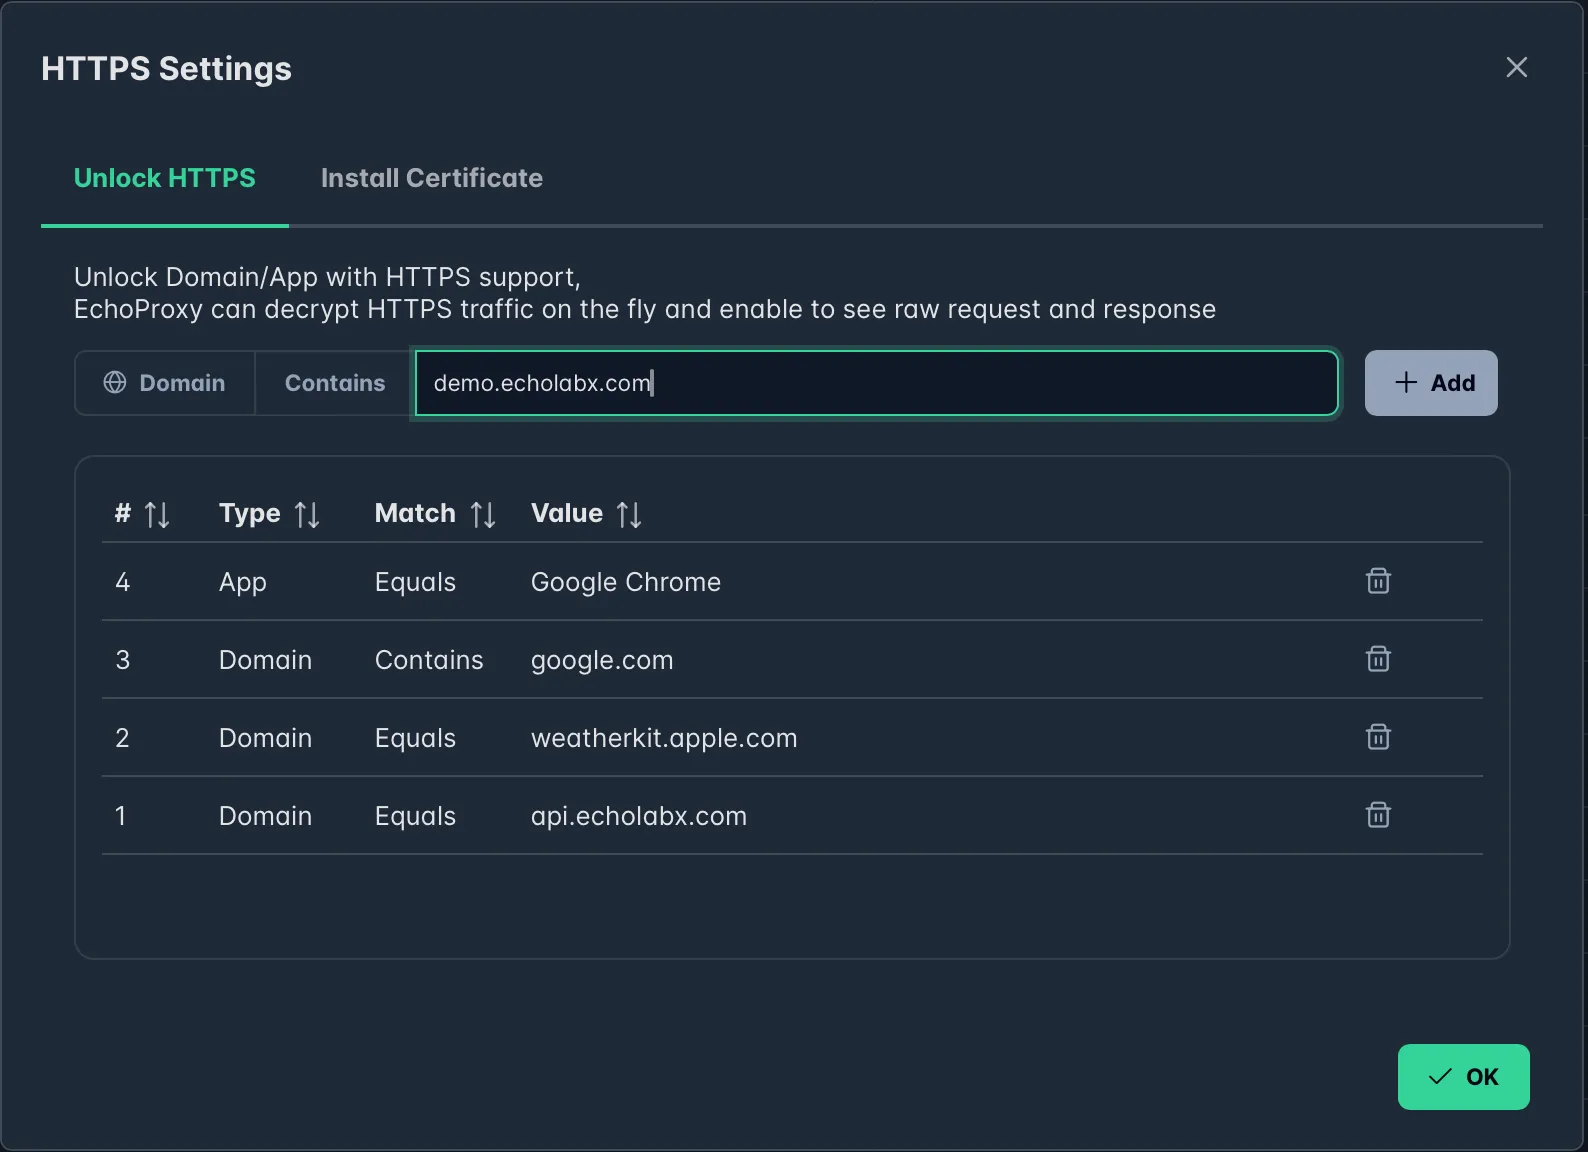
2. HTTPS Settings dialog
You can manage all unlocked domains and apps in HTTPS Settings dialog.
Click top toolbar button to open HTTPS Settings dialog.